Showing posts with label software. Show all posts

Get Windows 10 for Free After July 29th, with a Little Prep Now


Microsoft has confirmed that Windows 10’s free upgrade offer will expire on July 29, 2016. After that, you’ll have to pay $119 to upgrade on any computer that hasn’t already made the leap. But with a few simple steps, you can “reserve” that free copy now, so you can upgrade after July 29 without paying.
We know not everyone wants to upgrade to Windows 10 right now, and that’s fine. But one day, you’ll probably have to. And you don’t want to have to pay $119 for it. By upgrading a computer now and then rolling back to Windows 7 or 8, you’ll get to keep your original version of Windows, but “reserve” that free Windows 10 license for all your PCs.

How This Works

When you upgrade to Windows 10 from a PC running a genuine and activated Windows 7 or Windows 8.1 operating system, your PC receives a “digital entitlement.” Basically, Microsoft notes on its servers that your particular PC’s hardware is eligible for Windows 10 going forward.
Once your PC is eligible, it’s always eligible–you can reinstall Windows 10 from scratch and it’ll automatically activate, without you even entering a product key. You can even install a different operating system–like Windows 7 or Linux–and reinstall Windows 10 later, fully activated and genuine.
Note that this is tied to your computer’s specific hardware, not your Microsoft account. The free Windows 10 license you receive will only work on that PC–if you upgrade the motherboard or try to install Windows 10 on another PC that doesn’t have the digital entitlement, it won’t work.
So, in order to “reserve” Windows 10, we’re going to walk you through the steps of upgrading to Windows 10 on your machine, then reverting to Windows 7 or 8. You get to keep the version of Windows you love, but your PC will be entitled to Windows 10 at any point in the future, without having to pay $119.
We’ll walk you through two methods: A simple method that involves upgrading and rolling back, and a slightly more complex method that involves cloning your current disk, so everything isexactly how you left it.

The Easy (But Imperfect) Method: Upgrade and Roll Back

The easiest way to do this is use the “roll back” feature to uninstall Windows 10 and get your old Windows 7 or Windows 8.1 system back. However, this may not always work perfectly. Some programs may be removed during the upgrade and you may have to reinstall them afterwards, for example. If you want to be extra sure everything stays exactly as you left it, head to the next section for the slightly more complicated option.
However, if you’d like to live dangerously (and don’t want to waste much time), the upgrade and roll back method is simple. First, download the Windows 10 upgrade tool, run it, and agree to upgrade your PC to Windows 10.
After Windows 10 is installed, click the “Start” button and select “Settings.” Navigate to Update & Security > Activation. Ensure it says “Windows 10 on this device is activated with a digital entitlement.” If it does, your PC is registered with Microsoft and you can install Windows 10 on it whenever you like. You may need to wait a while for Windows to contact the activation servers.
Once your activation looks good, go to the Recovery tab and click the “Get started” button under “Go back to Windows 7” or “Go back to Windows 8.1.”
Windows 10 will automatically uninstall itself and restore your old Windows system to your hard drive. Congratulations! You’re now back to Windows 7 or 8, but are eligible to upgrade to Windows 10 for free, even after the July cutoff date.

The Complicated (But More Exact) Method: Image and Restore Your System Drive

For maximum safety, you’ll want to create an image your Windows 7 or 8.1 system drive before upgrading. Then, after upgrading, you can restore that cloned image to your computer, ensuring you’ll get your system in the exact state it was in before.
You’ll need an extra hard drive to accomplish this, at least as big as the one in your computer. (Alternatively, you can use several discs, but that could take a very long time.)
You’ll also need a third-party tool to image your drive. We recommend Macrium Reflect for this. So download and install the free version on this page and launch it. You’ll be prompted to create rescue media, which you can use to restore your backup image later. If you aren’t, click Other Tasks > Create Rescue Media. Go through the wizard, selecting the default options and then choosing the device you want to use for your boot media. You can either create a bootable USB stick or burn this rescue media to a disc.
Next, in the main Macrium Reflect window, click the “Create an image of the partition(s) required to backup and restore Windows” option in the sidebar. On the Disk Image window that pops up, make sure the entire disk is checked under “Source”–you don’t want to miss any of those partitions. Under Destination, choose your spare hard drive as the “Folder”.
Click “Next” to go through the wizard, ignoring all the advanced settings about templates and scheduling. Click “Finish” at the end of the wizard and then wait for Macrium Reflect to image your drive.
When Macrium Reflect is done cloning your drive, download and run the Windows 10 upgrade tool. Allow it to upgrade your PC to Windows 10. This may take a while, so give it time.
Once the upgrade finishes, your computer should, in theory, be permanently eligible for Windows 10.
To make sure, click the “Start” button in Windows 10 and select “Settings.” Navigate to Update & Security > Activation. Ensure it says “Windows 10 on this device is activated with a digital entitlement.” If it does, your PC is registered with Microsoft and you can install Windows 10 on it whenever you like. You may need to wait a while for Windows to contact the activation servers.
All good? Good. Now it’s time to roll back to your old setup.
Boot your computer from that Macrium Reflect recovery drive we created during the initial setup. You can do this by entering the boot menu when your computer starts, or changing your computer’s boot drive order.
Once in the recovery tool, connect the external drive you backed up to. Select the “Restore” tab and use the “Browse for an image file” option to select the image you created earlier. Click “Restore Image” to restore the cloned image back to your computer.
Now, carefully select the system drive you imaged earlier–the original one you had Windows installed on. If your computer has multiple disks, be sure you’re restoring the image back to the same drive you originally cloned. If you don’t, you could lose data!
Use the “Copy selected partitions” option to copy the partitions from your image back to the disk. Finally, click “Next” and finish going through the wizard. Macrium Reflect will restore your image, overwriting Windows 10 with your original Windows installation.


The Clean Slate Option: Upgrade to Windows 10, then Reinstall 7 or 8


If you don’t mind reinstalling Windows fresh and losing everything on your computer, you can always upgrade to Windows 10, then do a fresh install of Windows 7 or 8 afterward. Be sure you have backups of your important files before doing this!
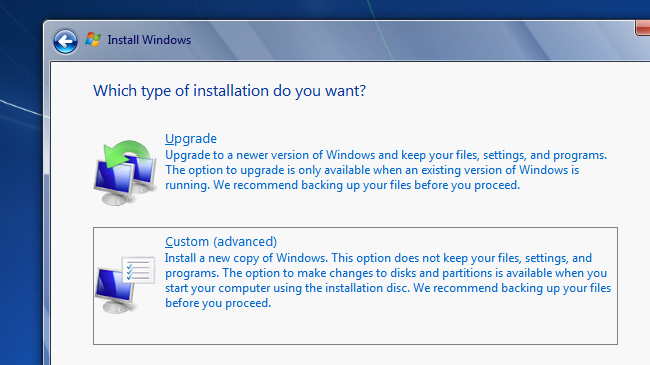
Just download and run the Windows 10 upgrade tool and let it upgrade your PC. After you’re done, download Windows 7 or 8.1 installation media from Microsoft’s website, place it on a USB flash drive or DVD, and boot from it. Go through the normal process of reinstalling Windows and wipe your hard drive, replacing Windows 10 with the older version of Windows.
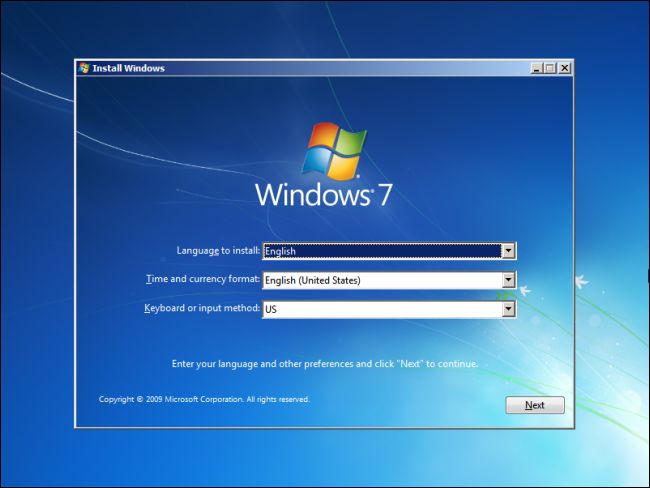
You’ll need a valid Windows product key for this. The Windows product key that came with your computer should usually work, but Microsoft doesn’t guarantee that “OEM” or “Original Equipment Manufacturer” keys can always be used to reinstall Windows. (If you run into errors, try activating it with Microsoft over the phone–that often works.)

How to Uninstall Windows 10 and Downgrade to Windows 7 or 8.1


Don’t like Windows 10? As long as you’ve upgraded within the last month, you can uninstall Windows 10 and downgrade your PC back to its original Windows 7 or Windows 8.1 operating system. You can always upgrade to Windows 10 again later.
Even if it’s been more than a month, you should be able to reinstall the version of Windows that came with your PC using fresh installation media and its product key.

Go Back to Windows 7 or 8.1


If you’ve upgraded a PC to Windows 10 — not performed a clean install, but an upgrade — you’ll have an easy option that lets you revert to the last version of Windows. To access this, open the Start menu and select Settings. Click the “Update & security” icon and select “Recovery.”
You should see a “Go back to Windows 7” or “Go back to Windows 8.1” option. Click the Get started button to get rid of your Windows 10 install and restore your previous Windows install. Microsoft will ask you why you want to go back.
If it’s been over a month — or if you’ve run the DIsk cleanup tool and removed the “Previous Windows installations” files or deleted the C:\Windows.old folder by hand — you’ll no longer see this option. Windows 10 appears to automatically remove the old Windows installation files after a month to free up space.


This Uses the Windows.old Folder


This works because Windows 10 stores your old Windows installation in the folder named “C:\Windows.old” on your computer. You can see this folder in File Explorer, though you shouldn’t attempt to delete it from here. You can also browse the Windows.old folder and restore files from it.


Obviously, storing every single file from your old Windows installation takes a lot of space. If you open the Disk Cleanup application, you’ll see just how much space it uses. Click the Start button, type “Disk cleanup” to search for it, launch it, and click the “Clean up system files” button.
Find ‘Previous Windows installation(s)” in the list, and you’ll see just how much space it’s consuming on your hard drive. If you’re sure you don’t want to go back to your previous version of Windows, use Disk Cleanup tool to remove those files and immediately free up space.


How to Downgrade if Windows 10 Doesn’t Give You The Option


Assuming you have an old computer you upgraded to Windows 10, that computer previously had Windows 7 or 8.1 on it. That means that computer came with a product key that allows you to use Windows 7 or 8.1 on it. To get back to an older version of Windows, you’ll have to perform a clean install of Windows — something PC geeks often do on new computers, anyway.
Thankfully, Microsoft now offers easy downloads for Windows 7 and 8.1 ISO files. Download the Windows installation media and burn the ISO file to a disc or copy it to a USB drive using Microsoft’s Windows USB/DVD download tool. You can then boot from it and reinstall Windows 7 or 8.1 fresh, telling it to overwrite the Windows 10 system already on your hard drive. Be sure you have backup copies of all your important files from your Windows 10 PC first.
You’ll have to find your PC’s product key if you do this. On a Windows 7 PC, examine your PC for a “certificate of authenticity” sticker with a key on it. They sticker may be on the underside of your laptop, in the battery compartment under a removable battery, or even on a laptop’s power brick. On a Windows 8 PC, you may not have to do this at all — the key may be embedded in your computer’s firmware and Windows 8.1 will automatically detect it and allow you to reinstall Windows 8.1 without even asking you to enter a key.
If you bought a new PC that came with Windows 10 and you want to go back to a previous version of Windows, that’s tougher. To do this legitimately, you’ll need to purchase a Windows 7 or 8.1 license and install it from scratch, entering the product key you purchased during the install process.
If an important program or hardware device you use doesn’t work on Windows 10, you’ll want to downgrade. If Windows 10 just seems unstable, you’ll want to go back to your previous version of Windows and wait a while longer before attempting an upgrade. Or, if you’d just rather hang onto Windows 7 for a while longer, you can downgrade.
Windows 10 will remain a free upgrade for the first year, after all.

How to Change the Date of your Digital Photographs

John Q. Public has just finished importing the videos and pictures from the digital camera to his laptop but realizes that the media files are incorrectly time-stamped.


Maybe the date and time settings of his “point and shoot” camera were set incorrectly or maybe the digital camera was stamping the files with local time though the pictures were being shot in another country with a different time zone. He probably forgot to change the time stamp of the camera before going on vacation.
How does John change the data and time of his pictures?
Most image editing software, Picasa and iPhoto included, allow you corect the data and time of photographs imported from a digital camera or a smartphone. You can import your digital photos in the software and select the ones that need to be fixed.
In the case of Picasa, choose Tools -> Adjust Date & Time and select a new date for your photos. This will change the “Date Picture Taken” field in the EXIF data of you picturs. Similarly, iPhoto users can choose Photos -> Adjust Date & Timeto set the selected photos to a particular date and time.
I however prefer a little-known command line utilitly called ExifTool for such operations since it is much more versatile. To get started, download the ExifTool executable and extract the zip file to your desktop. Now rename the exiftool(-k).exe utility to exiftool.exe and we are all set to adjust the date and time of our photographs.
Unlike the iPhoto or Picasa software that simply set the date and time of a photograph to another time stamp, Exif Tool can “shift” the data and time values associated with a picture. For instance, if your camera’s time was off by 2 hours 30 minutes at the time of capture, you can use ExifTool to shift the time stamp of all your pictures only by that “off” duration.
The sytax is:
exiftool.exe "-DateTimeOriginal+=Y:M:D h:m:s" filename.jpg
For instance, if wish to shift the time of photographs by 5 hours and 30 minutes, the command would be:
exiftool.exe "-DateTimeOriginal+=0:0:0 5:30:0" filename.jpg
And if you wish to perform a negative shift by 1 day, the command would be:
exiftool.exe "-DateTimeOriginal-=0:1:0 0:0:0" filename.jpg
Please refer to this document for the exact syntax and other examples.


exiftool.exe "-AllDates+=Y:M:D h:m:s" filename.jpg
Exif Tool makes a copy of your original photograph before updating the time stamp. The tool is free and available for Windows, Mac and Linux.

Download Mac Updates Once and Install on Multiple Computers

Mac OS X updates are huge with the installation files running into several gigabytes. The same is true for Mac apps like iMovie or Microsoft Office that have massive installers. The problem is compounded when you own multiple Mac computers and you need to upgrade them all to the latest OS X update. It will not just take too much time but you may end up consuming your monthly download bandwidth


A simple and obvious workaround to the problem is that you download the installer files on one Mac machine and then transfer the downloaded apps to all your other systems through AirDrop or WiFi. The Apple website says that “Apps [downloaded] from the Mac App Store may be used on any Macs that you own or control for your personal use.” This is however easier said than done.

Install Mac OS X Updates on Multiple Macs

You download a 5 GB Mac OS X installer from the App Store, the machine restarts, your system is upgraded to Mac OS X Yosemite or El Capitan but wait, where has the installer disappeared? Your Mac, in a bid to save space, deletes the original installer automatically after the upgrade and thus you cannot reuse it on other machines.
To get around the problem, after the installer has downloaded, quit the installation routine and do not restart the machine. Go to the ~/Applications folder on your Mac, find the installer file and Option+Drag it to another folder like ~/Downloads to make a copy that will stay even after the machine is restarted.
For minor updates, like OS X 10.10.8 or 10.10.9 updates, Apple releases standalone installers as .dmg files that you can download once and install on multiple machines. The releases are available as incremental updates (containing only changed files) or combo updates (all changed files since the last major release).
A simple Google search for “download mac ox x 10.10. combo” will reveal the direct download links for the .dmg files on the Apple support website.


Install Mac Apps from the App Store

In the case of apps downloaded from the Mac App Store, you’ll find the .app files in your /Applications or /Users/username/Applications folder that you can easily copy to your other Mac machines. Internally though, the App Store downloads the installer as a package file (with a .pkg extension) and this will not reside in the Applications folder but in a separate hidden folder.
You can grab these Installer Package files and install the same Mac app on other machines without having to download it again thus saving data. To get started, open terminal on your Mac and run the following command to know where the App Store has downloaded the installer files:
defaults write com.apple.appstore ShowDebugMenu -bool true

Now open the Mac App Store app and you’ll see a new Debug menu (see screenshot). Click the “Show Download Folder” menu and it will open the location of the download folder inside Finder where the Mac apps are temporarily download. You can find the .pkg files inside one of the sub folders that you copy to your other Mac systems via Airdrop.
[Bonus Tip] If you are upgrading to a new version of Mac OS X, like the upcoming El Capitan, press Cmd+L at the installation screen and it will open the installation log so you know what’s exactly happening behind the scene.

How To Use Samsung Smart View with Your iPhone/iPad

Samsung Smart View is a free application that turns your iPhone or iPad into a remote control for Samsung Smart TVs. In order to use this application, all that is required is that both devices be connected to the same local network. 

Control Your Samsung Smart TV with Your iPhone/iPad

Download Samsung Smart View from the Apple Store: 


Once downloaded, you will be able to change channels and control your television volume from your iPhone. You can even browse through Smart Hub applications and input text via the iPhone's virtual keyboard.

How To Reset a Wii U Console to Factory Settings

In this tutorial, you will learn how to reset your Wii U console to its factory settings. Please note that by doing this, all of your saved games, user profiles, and custom settings will be deleted from the console. 

How To Reset Your Wii U to Original Factory Settings

Start your Wii U and tap on the Settings icon (the wrench) of the Wii U gamepad. The System Settings menu will be displayed. 

Next, go back to the WiiU gamepad and use the left stick to move to the Delete All Content and Settings section. Press A to select. If you have enabled the Parental Control feature, you will be requested to enter your PIN. 

Click on OK, and then tap on Next > Delete Everything to complete the reset.

How To Record Gameplay on the PlayStation 4

The PlayStation 4 comes with a built-in DVR (digital video recorder) feature allowing you to record your gameplay footage and share it with your friends on social networks. This feature is only available within games (you won't be able to record the home screen) and it can record up to 15 minutes of your gameplay. 

How To Record Video on the PS4

Launch your game, and when ready double tap on the Share button of the DualShock4 controller to start the recording. The small video clip icon that appears at the top left corner of your screen indicates that the game is currently being recorded. 

Tap the Share button once more to stop the recording or double tap on the Share button to restart the recording over. 

Once you've hit the Share button, you will be take back to the Share screen > How do you want to share your experience? > Upload Video Clip. Tap on X to Upload the video to Facebook, YouTube or Daily Motion or tap on Square button to save the video to your Gallery > Video Clipsfolder (next to your screenshots). 

Before sharing your video, you should perhaps remove any unwanted sections. This operation can be performed directly from the Share screen: 

Tap on the Options button > Share Settings > Video Clip Settings > Trim

Switchable Graphics Cards on Windows 10

Some laptops come equipped with dual graphics cards, namely a high-performance standalone one (also known as a discrete graphics card) to run graphic intensive programs, and an integrated graphics chip built into to the motherboard. 

Integrated graphics cards are usually sufficient when it comes to running your OS (desktop), and performing basic tasks such as web browsing, video playback and document editing. However, in order to run games or graphic-intensive programs such as video editing, 3D animation, and CAD software, it is recommended that you switch to the discrete graphics card. This process is usually done by your operating system, but Windows 10 also allows you to launch program with the graphics card of your choice. 

The actual procedure of changing your graphics card is very easy. Simply right-click on the program shortcut > Run with graphics processor. You may then click on your desired option to designate the correct graphics card: 


How To Set Custom Wake Up Command on the Galaxy S6


S Voice is an intelligent personal assistant built into Samsung's newer range of smartphone products. Among the capabilities of S Voice are the ability to ask questions, control applications, conduct internet searches, and even customize a wake up voice command


How To Set Up "Wake Up" on the Samsung S6 Edge 

Go to Apps > S Voice and tap on the Cog icon to open S Voice Settings. Tap on Voice wake-upand enable the function. Next, tap on Set wake-up command, and follow the onscreen instructions to set your voice command. You will be asked to repeat your wake up command a couple of times before it is saved. 

At the end of the procedure you will be brought back to S Voice, indicating that your wake up command should be set and operational. 

Wake Up Command Not Working

If your wake up command is not working, simply go back to the Voice wake-up settings and tap on Listen to wake-up command to check if you are using the right command or not. 

Register a New Wake Up Command

Navigate to the Voice wake-up settings and tap on Delete wake-up command. Repeat the above operation to set your new command. 

N.B. Don't forget to enable the Wake up in secured lock feature in S Voice settings to allow voice wake up when the device is locked.

How To Create a Bootable USB Installer for OS X El Capitan

This procedure explains how to create an installation key for Mac OS X El Capitan using a USB key. This method will work for OS X El Capitan, Yosemite, Mavericks, and Mountain Lion updates. 

How To Make an El Capitan Install Drive with a USB


El Capitan Information Pages on Apple.com

Before beginning, you may want to familiarize yourself with the upgrade process, and hardware requirements necessary for the El Capitan installation. 

Pre-Requisites for the El Capitan Update

There are several prerequisites necessary for a successful installment of El Capitan. A list of requirements for the compatible models can be found below.

Compatible Macs

MacBook (released early 2015), MacBook (aluminum series released late 2008 - early 2009 or later), 
MacBook Pro (released mid/late 2007 or newer models), 
MacBook Air (released late 2008 or newer models), 
Mac Mini (released early 2009 or newer models), 
Mac (released mid 2007 or newer models), 
Mac Pro (released early 2008 or newer), 
Xserve (released early 2009). 

Requirements

OS X 10.6.8 or later, 2GB of RAM (minimum), 
8GB of storage space, 
Some features require an Apple ID
Some features require a compatible Internet service provider; extra charges may apply. 

STEP 1: Download El Capitan

Launch the Apple App Store, and sign-in using your iCloud account. Click on OS X El Capitan >Download to begin the download process. The El Capitan download will utilize about 6GB of space. 

Once the installation package has been downloaded, it will launch automatically. Do not click onContinue

You may quit the installation by clicking on the Install OS X menu > Quit Install OS X. Leave the installation package (Install OS X El Capitan) in the Applications folder, and proceed to the next step. 

STEP 2: Prepare the USB Installation

You will need a blank 8GB USB key. Connect the USB key to your Mac and launch the Disk Utilitylocated in Applications > Utilities. Select your USB drive (not its existing partition, but the physical key itself). Click on Partition Layout and select 1 partition. Next, select the Optionbutton, making sure that GUID Partition Table is selected. Click OK

Select Mac OS Extended (Journaled) as the default format for the drive. Rename your USB key to something more significant (e.g. elcapitan) and make a note of it somewhere. You will need the exact name for a terminal command in STEP 3

Click on Apply > OK

STEP 3: Creating the Installation Key

Launch the Terminal application located in Applications > Utilities and type the below command: 

sudo /Applications/Install\ OS\ X\ El\ Capitan.app/Contents/Resources/createinstallmedia --volume /Volumes/e/name_of_USB --applicationpath /Applications/Install\ OS\ X\ El\ Capitan.app --nointeraction 

Replace name_of_USB with the name you have chosen for your USB key. 

Confirm with the Enter key, and type your administrator password when prompted. Let the process unfold until the Terminal window says Done

Your OS X El Capitan installation USB key is now ready. 

Updating from OS X Snow Leopard and Leopard

Additional steps are required when updating from Snow Leopard (Mac OS X 10.6.x)

Click on the Apple menu > Update software. Update to Mac OS X 10.6.8 before downloading El Capitan from the App Store. 

Unfortunately, El Capitan will install directly onto your Mac. You will need to download it once more to get the installation package (installer). If you have Leopard (Mac OS 10.5) and would like to upgrade to El Capitan, you must first purchase and install OS X Snow Leopard

Remarks

This method creates a USB key called Install OS X El Capitan. The key contains an installer (installation package) named as Install OS X El Capitan. To perform an installation from the USB key, connect it to your Mac and then boot the key while holding the Alt key down. Boot from the USB key and then follow the onscreen procedure to install the new operating system. 

N.B. If at any point the installation procedure seems to stall, just let it be. Despite appearances, the installation procedure is likely just working slowly.